Thursday, January 23, 2014

Keeping Kids (or Pets) Safe With a Medication Log

If you've got a toddler at home I'm sure you've dealt with your fair share of colds and if you're not the only person caring for this child I'm sure you've had this conversation at lest once over the years.


I've been there and it's a little scary. All you can do is monitor your little one, make a mental note that you just carried out a parenting fail, pray that everything will be fine and be prepared to head to the ER if it's not.

To avoid making this mistake again, it takes a simple piece of paper and a minute of your time. A medication log posted in the area where you keep the meds is key to keeping your little ones safe from being over medicated.


A medication log can also be attached to the bottle in the instance that someone else is caring for your child in their home.


Some of you may be reading this and saying to yourself "why can't you just ask the person when the last time they gave the medication was" Of course that would work as well, if that person remembers the time and/or is currently available. But let's say they administered the last dose, the child is now solely in your care and your partner can't be reached at the current moment. You could do one of two things:
1. Wait until you're able to talk to your partner before giving your child another dose
2. Hope that it's passed the 6 hour time interval

Both of these things can be avoided with a simple medication log.

Take this same concept and use it if you have pets. A log could be kept for their medications or a simple fed/not fed sign near their food.

Hope this gives you some inspiration for your home.

Niki
 (If you'd like to read more about me visit my post on A Bit About Me).

Tuesday, January 21, 2014

Our Wiggles Birthday Party

For my son's 2nd birthday we did a Wiggles theme but the group looks very different these days. If you have a kid who's into the original group, here are some ideas for a great DIY party.

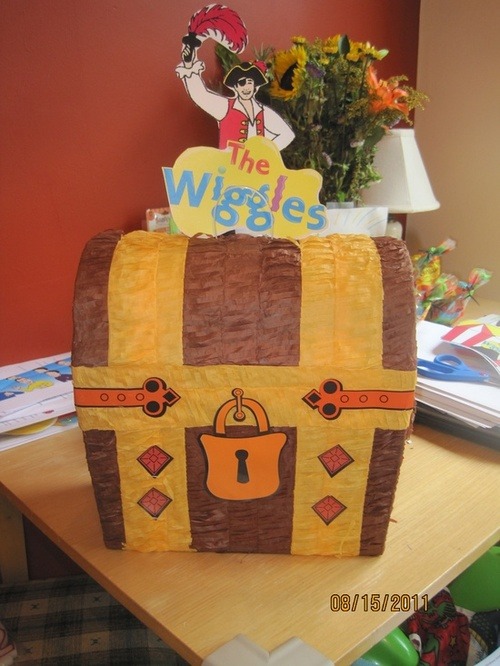
We couldn't figure what to do for a piñata until we expanded our ideas. We decided to go with Captain Feathersword and a treasure chest.

I bought a basic treasure chest from Party City and just added the Wiggles logo,which I printed off the internet, to the top and sides.

imageimage

For the rest of the decorations we just used Google images and The Wiggles colors of Red, Blue, Yellow and Purple. Here are some other party things we threw in.


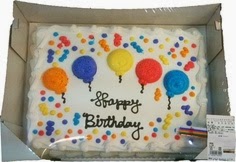
For the cake I cut out this Big Red Car with an exact-o knife and mounted it on a piece of foil. We purchased a balloon cake from Costco for $15 and asked them to write only on the two top corners, this allowed up to put the cutout in the center,


We played pin The Wiggles on the Road by making a big 2 on on foam board and cutting out more Wiggles cars for each kid.


Hope this has given you inspiration for your own party. Search  the net and pull some ideas then put your own spin on it by converting those ideas to fit your theme.
Enjoy,

Niki
 (If you'd like to read more about me visit my post on A Bit About Me). 


Monday, January 20, 2014

Bookcase Project for a Kid's Room

We were looking for a way to reduce the amount of clutter in the kid’s room so we got rid of the big bulky clothing hutch that housed their books, shoes, baby bibs and towels. Though the case could hold all of those items it wasn't visually appealing and it took up a lot of space in the room. With one trip to Ikea we purchased under bed storage for their shoes and we also found these really cool racks that we used for their books.

The shelves were actually in the kitchen area, they’re unfinished spice racks under the name BEKVÄM for $3.99 (wall anchors and screws not included)


We purchased 5 to complete this look.


The shelves took about 5 minutes per shelf to assemble but once they were all together we realized that the holes on the back were too small for the screws we had so we took a quick trip out to HomeDepot and purchased these smaller screws and anchors.


Without the trip to Home Depot, this was a 1/2 -1 hour job. The hardest part was getting the holes in the right spots and making sure the shelves were level. Once we got a system going, they were up in no time. 

The picture frames are from Ikea, they have plastic covers instead of glass so they're safer in the kid's room. The toy box was purchased last year from Ikea also.


In all we spent about $25 on the shelf project alone, if you want to paint the shelves that will run you a bit more.


Hope this gives you some inspiration for your home.

Niki
 (If you'd like to read more about me visit my post on A Bit About Me).

Saturday, January 4, 2014

For Boy Who Loves Tea Parties

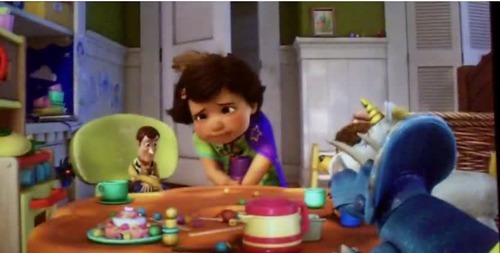
My son loves to reenact scenes from his favorite movies, so when he asked me if he could have a tea set to go along with his play food set to reenact the scene below from Toy Story 3, I thought it would be an easy request to fill. 

image
Toy Story 3 movie- Bonnie introduces Woody to her other toys as they sit around a table near her play kitchen.

I figured I could find a simple, gender neutral tea set at my local Toys R Us but when we got there all they had were frilly pink and white sets with hearts, flowers or “girl themed” characters. Needless to say we didn't leave the store with any of those as my, then 3 year old, son turned up his nose and said "mommy those are for GIRLS". They learn gender stuff at such an early age but I was determined to bridge the gap so I went into my crafty mom mode and figured I could make him a set he would LOVE.

As I started to move boxes around just to be sure I didn’t mess anything I saw this set:
image

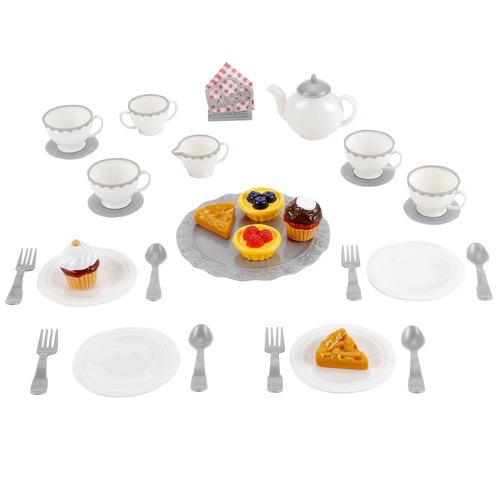
Here’s a picture from the website:
image
It’s a simple grey and white set that has a heart pattern on it but it’s molded into the plastic so it doesn’t stand out much. When I showed him the set he perked up a bit but was still skeptical because it had two girls on the front of the box. I saw that he wasn't very excited about it but I tossed the set in the cart knowing that I could jazz it up once we got home with the help of some left over stickers we had.

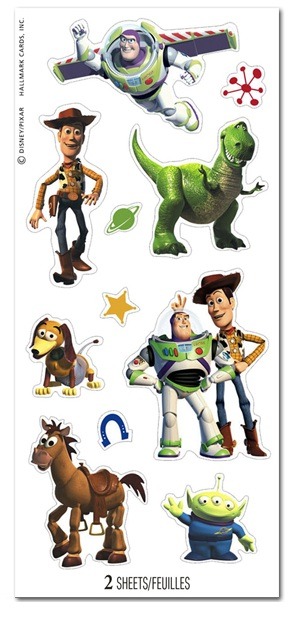
About a year ago I had purchased 2 sets of these stickers from Walgreens for $1.99:
image
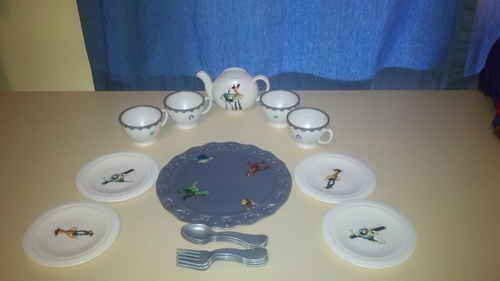
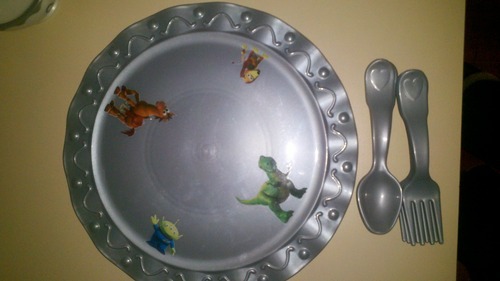
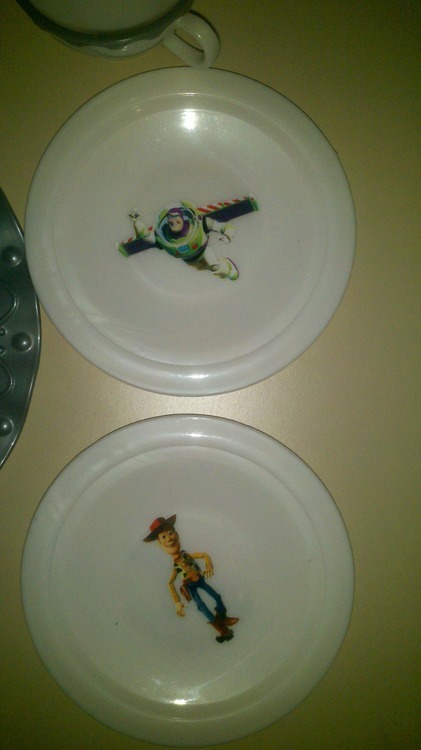
They have the characters printed on clear stickers instead of white so that they will blend onto whatever surface they are applied to. I hadn't opened one of the sets so there was just enough stickers for me to make him a custom Toy Story tea set.

I waited for him to take his nap and went to work on my project. When he woke up I had the set laid out for him and once he realized what it was, he got so excited.

He played with it a lot in the beginning but after a year and his new love EVERYTHING Avengers, it only makes an appearance a few times a month. One day he asked his uncle if he wanted to play tea party with him and when his uncle responded "tea parties are for girls" he said, with conviction, "no they're not, anyone can drink tea, see look at mine." My 20 something year old brother looked at me and then back at the tea set, knowing he was just trumped, took a cup and played. When he takes it out he still smiles and gets excited about it and my heart beams to know that little by little I'm helping my son stand behind what he loves and get passed gender stereotypes. I'm sure it gets harder as they get older but for now he's still a little boy who loves tea parties.


Here are a few shots of my final project.
imageimageimageimage